How to Create a Vision Board
- Heartwood Home Designs

- Jan 25, 2023
- 3 min read
This is one that I get asked the most about on social media. Lets first start with where you're going to make this...
I always use Paint 3D because it's easy and was already on my computer. If you don't have a PC then I would suggest Canva.com but you can only remove the background of your images with the premium subscription. If you don't have this, I would recommend it because it's amazing and can be used for a million different things including all of your social media posts.
Anyway - lets start with what room you're doing. Are you designing a bedroom, a living room, a dining room etc...? Choose one room unless you're doing an open concept living/dining room. That is the only real exception.
Ok, now which products are you going to be placing in the room? Do you have these already in mind? If so, that makes this way easier! If you're like me and build as you go then sometimes it can take a lot longer.
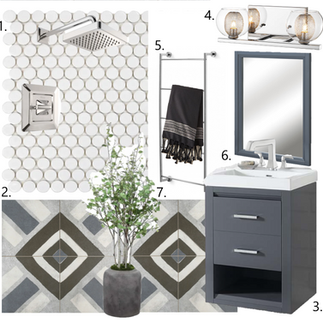
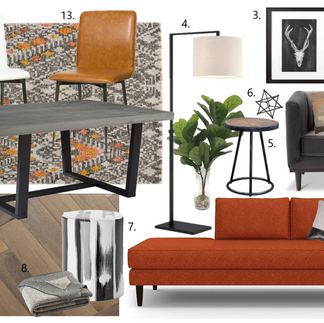
Start with a base. Sometimes I don't know exactly which colors I'm going to use but choosing one piece to work with always spark inspiration and gets me going on the room. So whether it's a paint color or a rug, work on the base first. Search online for the products. Go through websites like Target, Wayfair, WorldMarket and copy the image and past it into your blank slate in the program. Find a rug and place it on the bottom. You want to do this first because you can then layer the other pieces on top of it and it's easier to build up like that.
Then choose your bed or sofa or dining table. Whatever your largest piece in the room will be. This will help with centering, positions and scale. Images online are not always in the correct position that you want them to be. Sometimes the bed is centered and sometimes its at an angle. Like when staging a real room, you want to make sure the pieces flow and compliment each other. So make sure you're angling your items properly so that it makes sense and doesn't look like the room is on a tilt.
Then choose your next biggest pieces of furniture in the room. Keep in mind your color palate and your tones. You don't want some images to be overly exposed and the others to be muted. Much like staging, you want neutrals and a few accent colors with mixed patterns and textures.
Choosing your fillers. I call the decor items fillers because you want to make sure that there isn't too much white background in your board so that the room doesn't look empty. Too much white empty space and you lose the effect of the vision board. Choose pieces that make sure but that also fit the empty space. Artificial plants are good for tall skinny spaces and artwork is the best for the top of the board.
You want to keep in mind to place the items relatively similar to where they would be place in the room. You want it to make sense and to actually look as real as possible - that is the point of these anyway!
Now take a step back and check that your empty space is fine and that all of your images have the backgrounds removed.
TIP: to remove the background using Paint 3D, you will need to paste the image into the page and then select around the image and click on magic select. This will automatically choose what it thinks you want to keep. If you see it's missing some, you can select Add on the side and draw on the missing pieces. You can always deselect if it's chosen too much. Keep in mind, this takes a bit to get used to working with. Practice makes perfect! You will also find that the order in which you add the images and do this to them will effect the way they lay on the page. You can select an image again and move it forward with the little double arrow selection button on the left when the item is highlighted. This allows you to move it in plane.
If you still need help, please feel free to contact us and we would be happy to walk you through it!! Once you get the hang of this, it's a real game changer and makes the process so much easier. Don't forget to take a look at our examples and follow us on Instagram for more!


Comments